What are you setting up?
cPanel / WHM Server
Use the official JetEmail cPanel plugin to route Exim through the relay.
DirectAdmin Server
Use the official JetEmail DirectAdmin plugin for one-command setup.
Enhance Server
Configure the JetEmail smarthost in the Enhance control panel.
Application or Software
Generic SMTP setup for any app, CRM, or platform that accepts SMTP credentials.
Postfix
Configure Postfix as a relay through JetEmail on a Linux mail server.
Exim
Configure standalone Exim (no control panel) to use the JetEmail smarthost.
The universal flow
Every guide above follows the same five stages. If your platform isn’t listed, follow this flow and plug the SMTP details into your software’s settings.1. Sign up for JetEmail
Create an account at jetemail.com. Once you’re in, the dashboard lives at dash.jetemail.com.2. Add your sending domain
Each address you send from must belong to a domain JetEmail can authenticate.- In the dashboard, go to Outbound → Domains
- Add the domain you send mail from (e.g.
example.com)
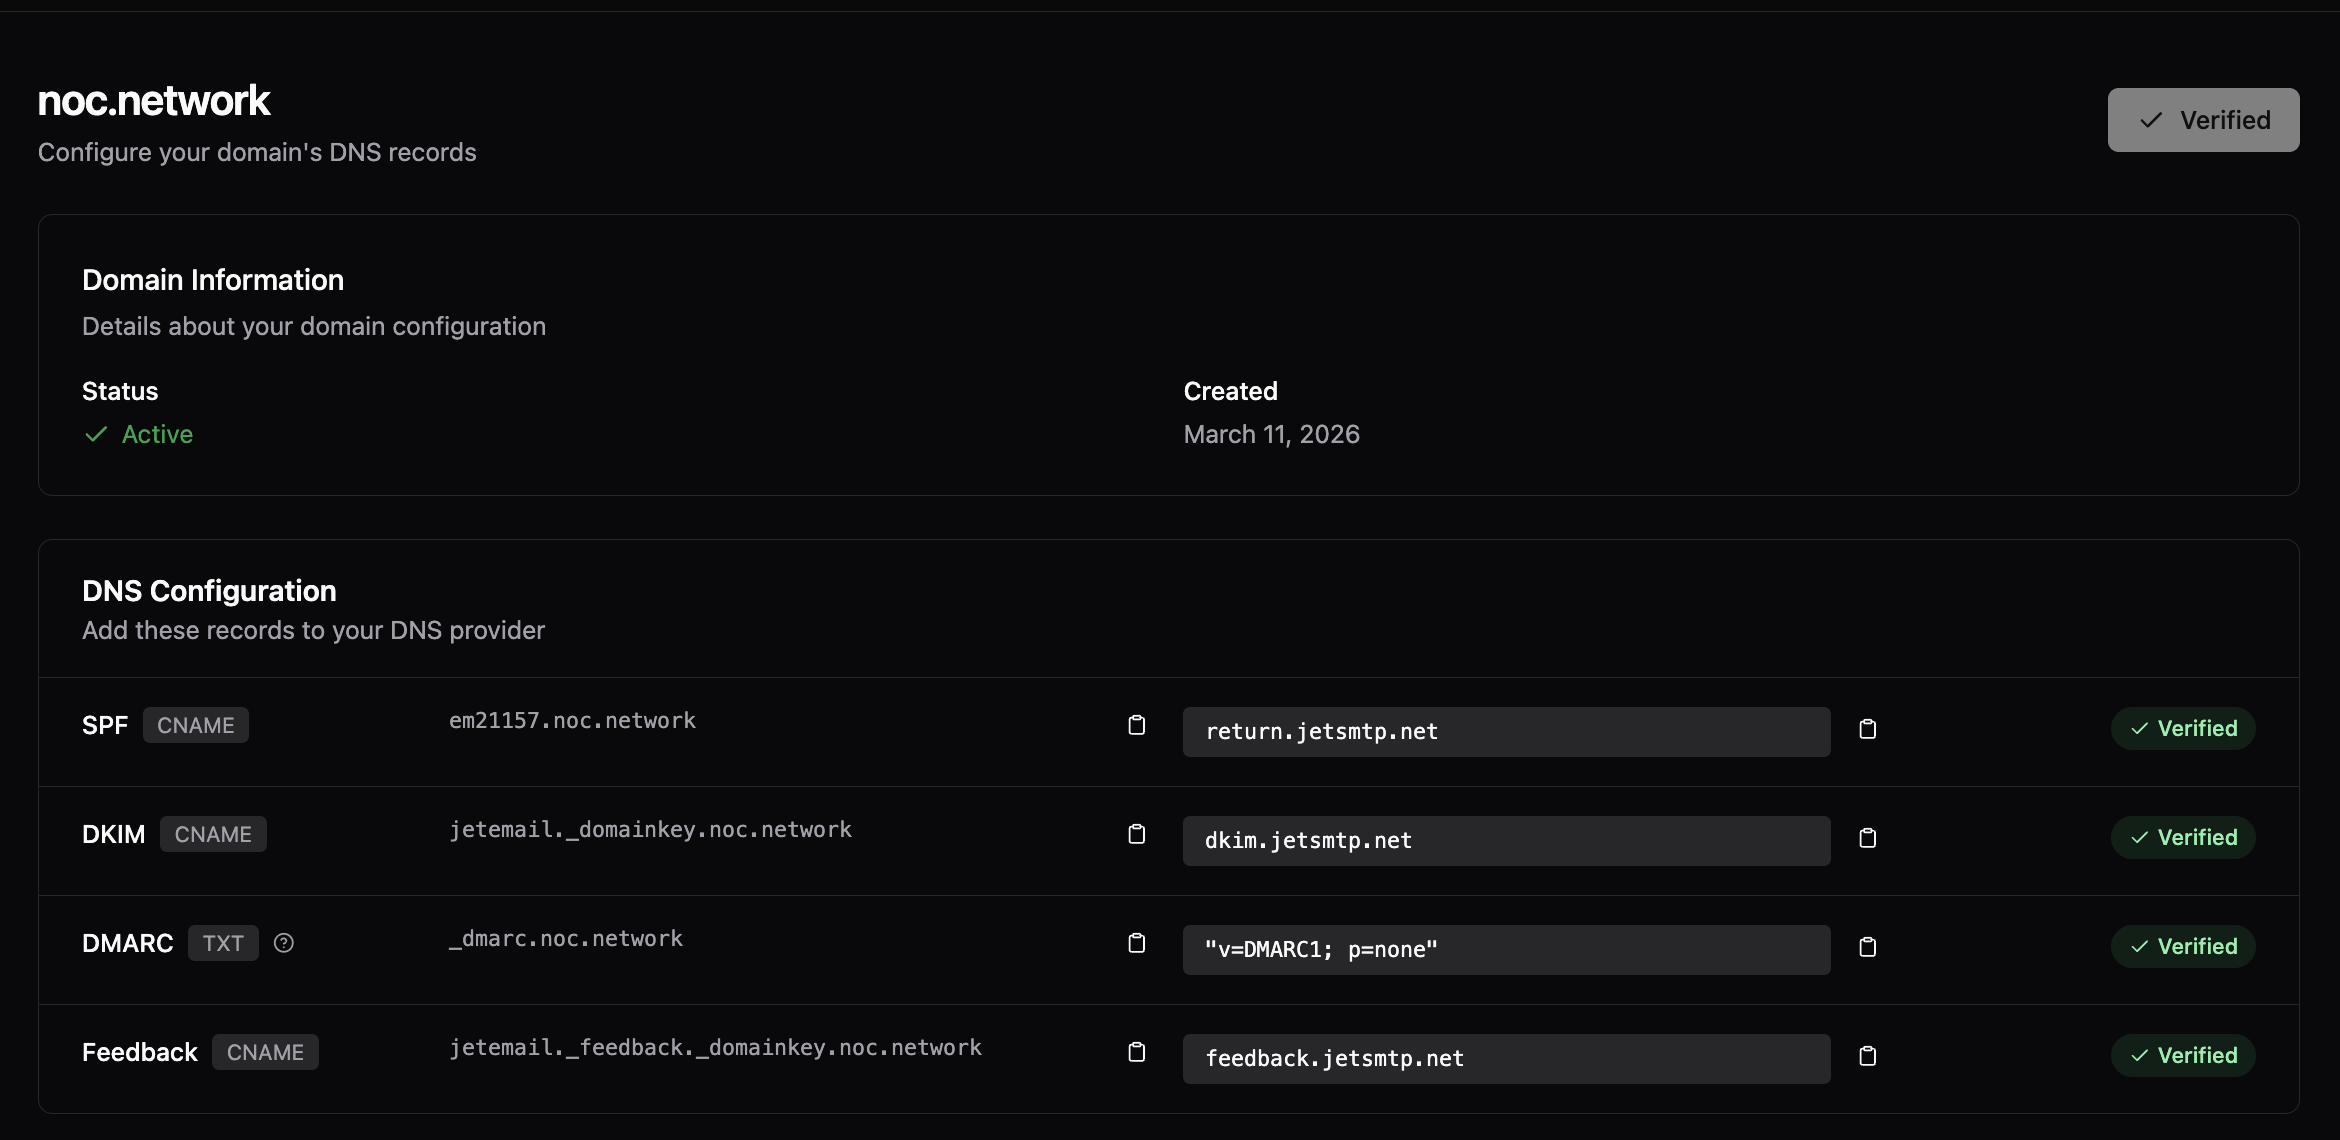
- Add every DNS record the dashboard lists (SPF, return-path, DKIM, DMARC) at your DNS provider
- Wait until the dashboard shows the domain as verified
SMTP “allow any domain”: If your account uses SMTP with allow any domain, you can send without adding the domain in the dashboard, but you must still publish SPF for each sending domain (see SMTP allow any domain). Adding the domain is still recommended for DKIM signing, aligned return path, and dashboard-only features like open and click tracking.
Domain validation
A domain counts as validated after you add it under Outbound → Domains and JetEmail verifies your DNS. Validated domains are required for open tracking, click tracking, BCC copies, and similar dashboard-managed features.3. Create an SMTP user
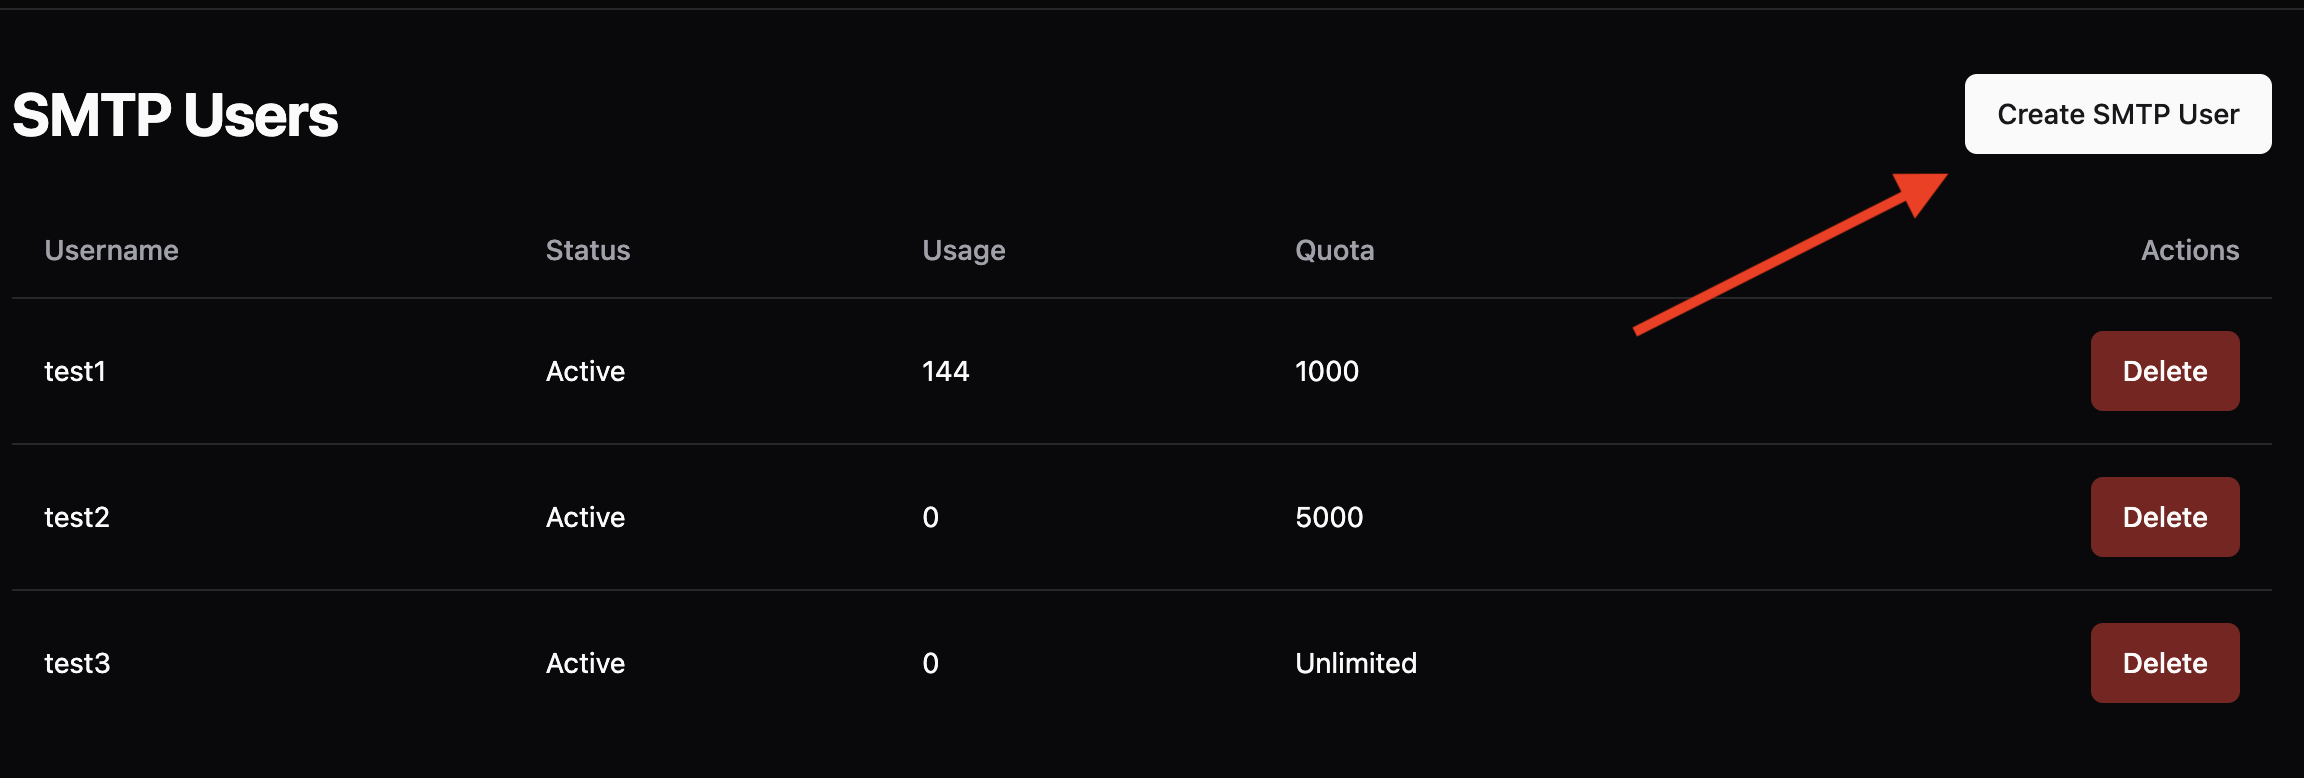
- In the dashboard, go to Outbound → SMTP
- Click Create SMTP
- Fill in the details:
- Username: Choose a unique username
- Password: Set a strong password
- Quota / Usage:
0for unlimited, or a per-user message limit

4. Configure your server or app
Use these values in your mail server, control panel, or application:| Setting | Value |
|---|---|
| Server | relay.jetsmtp.net |
| Ports | 25, 587, 2525 (STARTTLS) · 465 (SSL/TLS) |
| Authentication | PLAIN |
| TLS | Required on 25, 587, and 2525 (STARTTLS). Implicit on 465 (SSL/TLS). |
| Username / password | The SMTP user you created in step 3 |
relay-eu.jetsmtp.net with the same settings as above. The global endpoint (relay.jetsmtp.net) is the recommended anycast endpoint and gives you the best routing worldwide.